Whether you are selling your home or entering your amazing project in the 2018 Best in American Living™ Awards, you will need strong photos that convey all the best aspects of the property.
Unfortunately, this is an area where even professionals fall short. Capturing your creation in proper pixels can be tricky, and you don’t want your hard work overlooked because of shadows or bad angles.
So we enlisted Lynn Mitchell Lind, professional designer, stager, former real estate agent and owner of Lynn Loves Houses in Charleston, S.C., for a few tips to help you take better architectural photos.
Pairing opposites makes for a more interesting photo. The best architectural photographs emphasize what the room does best.
And if a property contains some juxtaposition, emphasizing the opposites brings more personality to your photo series. Look for spaciousness versus coziness, shaded versus lots of natural light, or modern building materials versus traditional scale and details.
Capture the three basic image types. You want to capture wide, real life, and detail shots. See our slideshow below for examples.
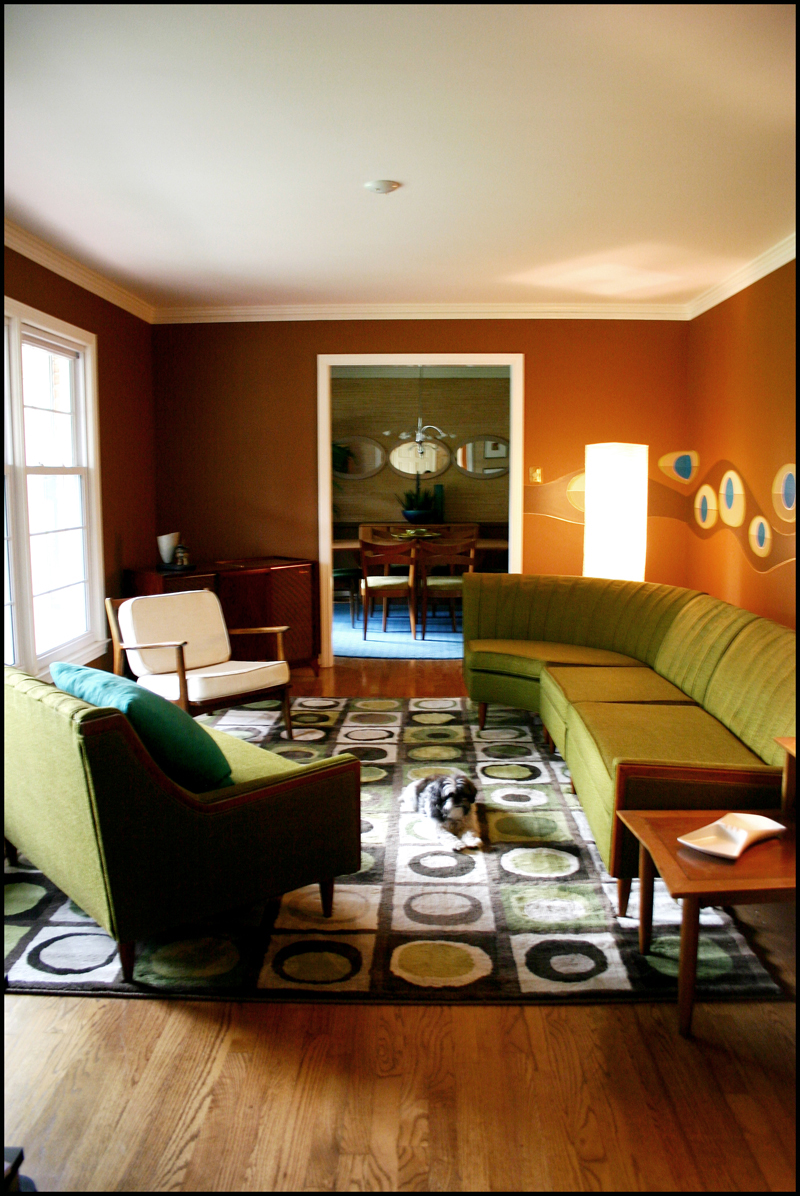
A living room shot from a wide angle.
Your initial shot of a room should be a wide angle shot. Shooting from about 4’ to 4’6” off the floor will give a realistic view, with the slight exaggeration that the room’s a little bigger. Shoot one shot from each corner of the room, and then decide which shots of the room look best. Any shots that don’t look top-notch, delete. Also, if there’s a centered feature like a fireplace or picture window, add some shots from the center of the opposite wall. Symmetry is comfortable to view.
If a library is dark and cozy, sit in a desk chair and take shots of a lamp next to the bookcase and reading chair (real life). If the fireplace mantel is intricately carved, get the camera in close, and fill the frame with one small nook of the carving (detail).
If a great room is bright and sunny, shoot from a corner, capturing as much of the light as possible. Then for a detail, catch a piece of furniture with the light draping over.
Here again, when you present the photos, present opposites following each other. Start with a wide-angle shot, then show a detail from the same room. Then repeat.
To photograph the home’s exterior, follow the same principles. Get a shot of the entire home from across the lawn, centered on the front door, or from about a 20-degree angle opposite the sun (wide).
Your real life photograph could be from the front walk with the front door open, so the focus is on the lit interior framed by the doorway (real life). And remember, exterior details are as important as interior details, including landscaping, door hardware, outdoor lighting or porch columns (detail).
Some other examples of wide shots: a spacious garage, a large lot, a house from down the street emphasizing the neighborhood, a grand entry, the golf course or lake behind the house.

A shot of a real life scene.
Real life: how the morning light hits the table in the breakfast nook, the kitchen from a bar stool at the counter, the view out the window of the bedroom, on the sofa across from the fireplace, sitting at the café table on the piazza.
Detail: railings, stairs, floors, hearths, chandeliers, trim work, mail box, landscaping, hardscapes, cabinet knobs, sconces, faucets, hardware–all the little things that set this property apart from the one down the road.
Shoot interiors midday. This helps alleviate the need to use an on-camera flash, which distorts color and relativity. However, even midday, turn on all light sources: lamps, overheads, sconces, and a fire in the fireplace.
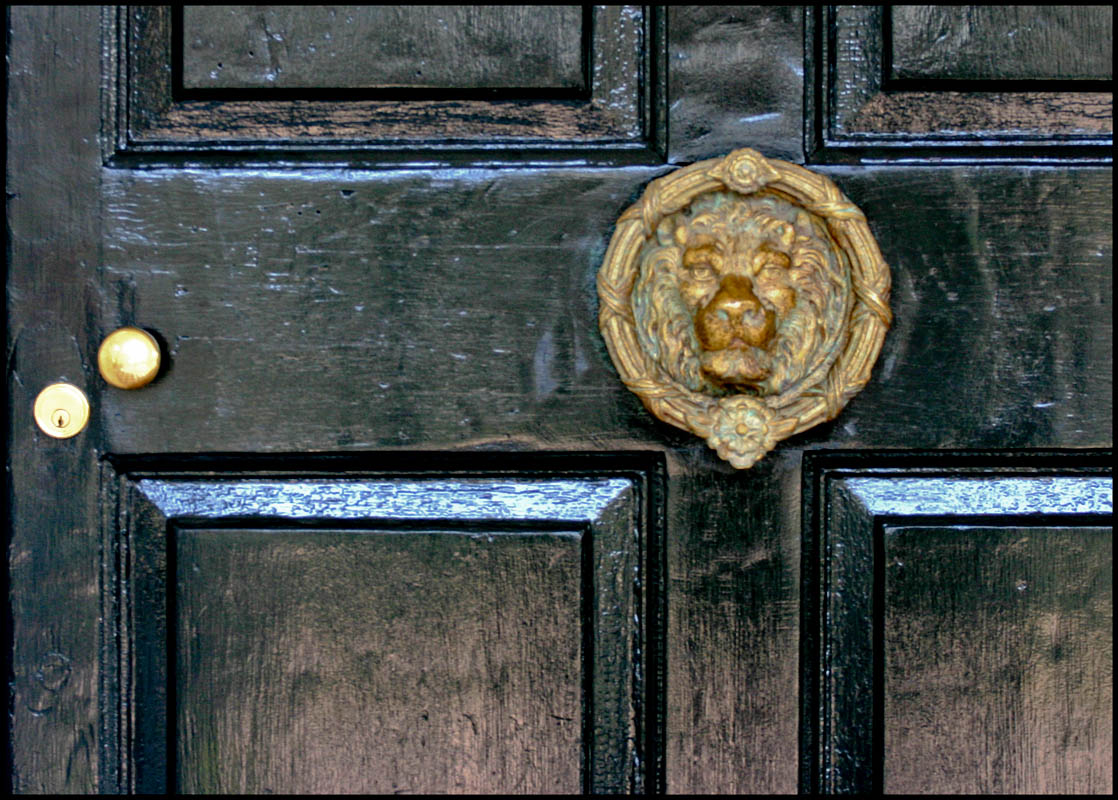
A detail shot of a classic door knocker.
If you can afford a professional photographer, interior designer or lighting designer, they can create a lighting system that will look spectacular in photographs, emphasizing and deemphasizing certain elements of the room.
Shoot the exterior in the early morning or late evening. There’s a reason Motel 6 says “We’ll leave the light on for ya.” If you turn on all lights inside and outside the home for the shot, your photo will have the feel of a family home full of life.
Finally, when you’re photographing the property, don’t think “house.” Think “home.” People aren’t just looking for brick and mortar; they are looking for magic.
Your photographs will reflect what’s on your mind and people will be drawn to your photos, which means more buyers in the front door—or votes for a BALA!
Slideshow: Wide, Real Life and Detail angles. (Photos copyright Lynn Loves Houses)